Adding UPS Shipping to WooCommerce allows you to ship with UPS rates directly from your WordPress site.
1. SETTING UP UPS PLUGIN
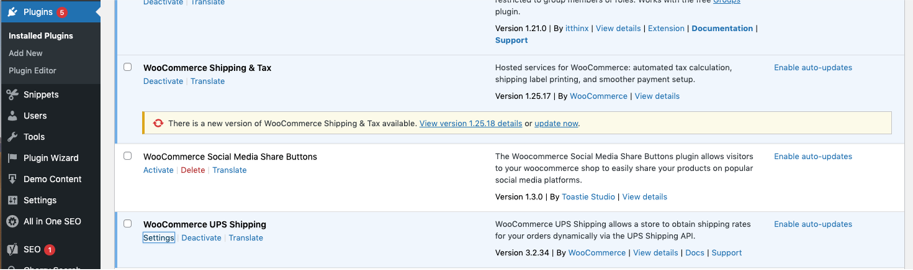
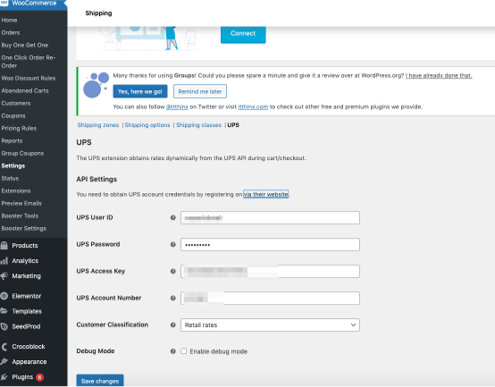
You first need to ensure that you have the WooCommerce UPS Shipping Plug-in Installed. Once installed, click “settings” to edit the settings.
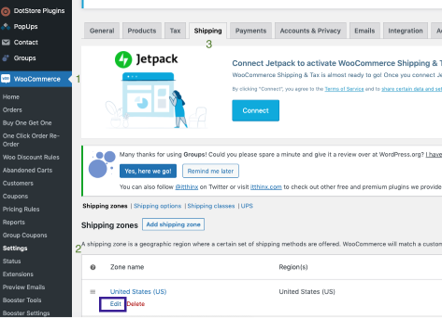
You can also reach this screen by going to 1. WooCommerce 2. Settings 3. Shipping 4. UPS
2. REQUESTING API ACCESS KEY
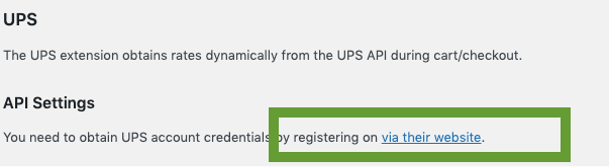
Once in the settings for the UPS Shipping Plugin, you will need to request API credentials. You will see the “API Settings” heading under “UPS.” Click “via their website.” This will redirect you to the UPS developer kit
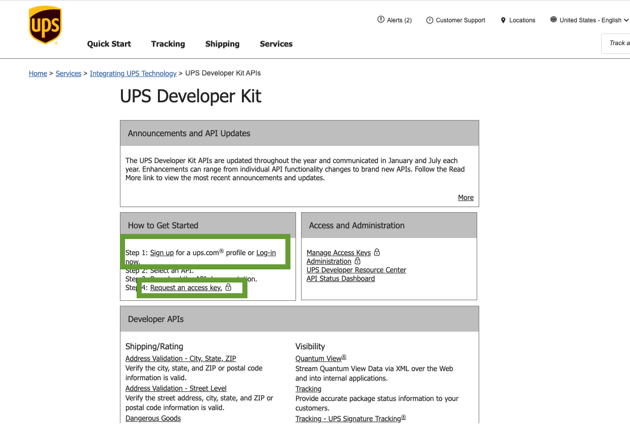
If you do not have a UPS account, follow step 1 under “How to get started” to create your UPS account. You will need tax and payment info.
If you have a UPS account created, skip to #4 and request an access key
3. FINISHING SET UP IN WOO COMMERCE
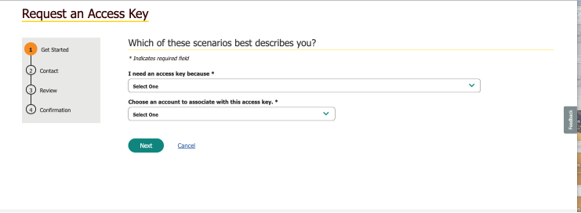
Follow steps 1-4 to create an Access Key. Most of your information will be saved after you have created an account. You will need your UPS Shipping Account #, though.
After following the four steps, an Access Key will be presented. Return to WooCommerce UPS Settings. Enter your Access Key as well as your Shipping Account and login info.
4. TURN ON UPS AS SHIPPING ZONE
Under the Shipping tab, go to the Shipping Zones button.
Where it says the United States hit edit
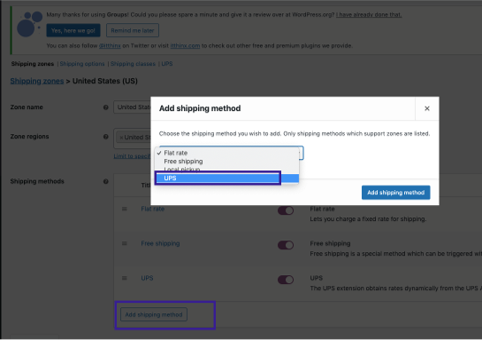
Select add a Shipping Zone, and the connected UPS account will show. Select this account and add it to the shipping zone. Then make sure this is turned on.
5. UPDATE UPS DATA
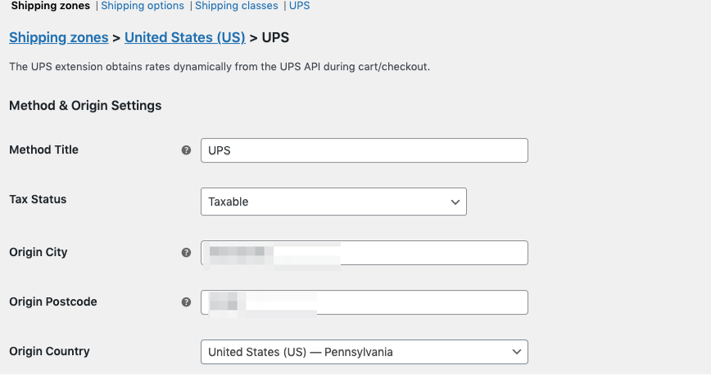
After you turn on the shipping zone, select edit
Make sure that your origin information is updated.
You can edit other options here, such as UPS Simple Rate Calculations, Negotiated Rate Calculations, Signature Requirement, and return rates.
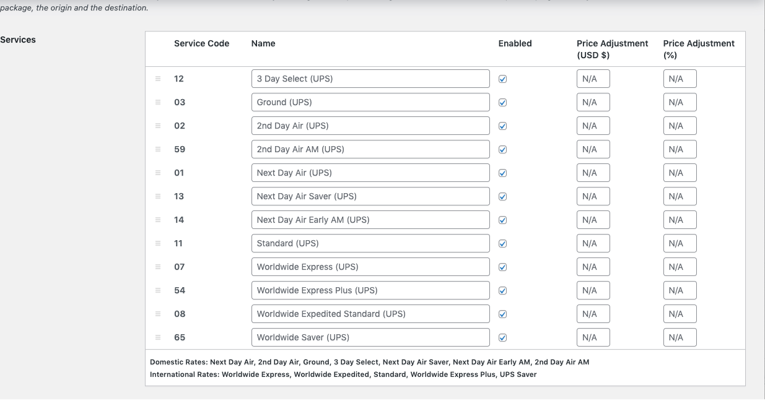
6. UPDATE SHIPPING METHODS AND PRICING
Below this, you can edit a group of shipping options such as next-day air, 3-day, standard and more.
For each method, you can increase the price by a $ or % as well as provide discounted shipping rates for select methods.
Each method can be added or removed here as well.
7. CREATE BOXES
Parcel Packing Method: You have two options, one is to pack each item individually, and the other is to pack it into boxes with custom weights and dimensions.
As shown, the default is to pack items individually. So, if customers have multiple products, they will cost more. That is why the recommended option is to pack it into custom boxes.
With this, you will need to create box dimensions and the max height, weight, and length that they can fit.
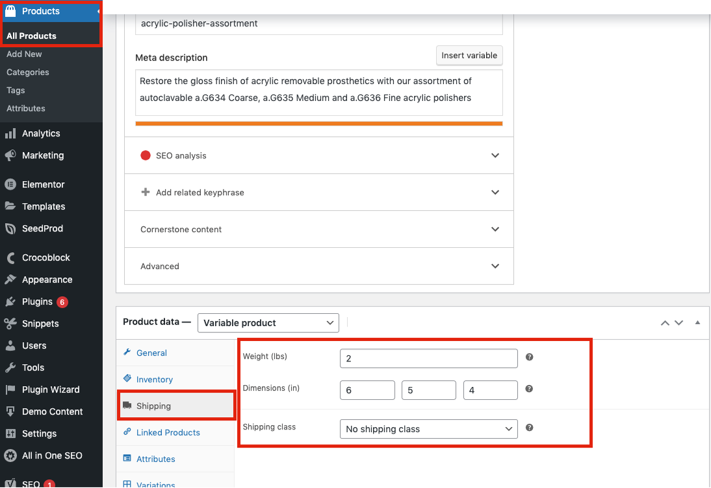
8. UPDATE PRODUCT DIMENSIONS
To utilize custom boxes, Products will have to have updated dimensions. This can be found in the products tab.
Under shipping, add the correct height, weight, and length. Then, UPS will calculate, based on the dimensions of each product, how many boxes will be needed to ship all of your products.
If you do not set custom dimensions for your products, WooCommerce will automatically make the dimensions the exact size of your boxes. You must set the product dimensions.